QuickTime Screen Recording with Audio [Full Guide in 2024]
 Sarah Miller | Updated: Aug 22, 2024
Have you ever wanted to record your screen for an online tutorial, work demo, or gameplay, only to find that QuickTime Player couldn’t capture audio on your Mac? If so, you’re not alone! This is a common problem for Mac users.
But don’t worry! This article will provide you with options on how to use QuickTime screen recording with audio and help you find the best solution for recording screen with audio on your Mac.
Read on to find out more!
Part 1. How to Record QuickTime Screen with Audio
Record Screen and Internal Audio with QuickTime
Mac users can easily record video and audio on their computers using the built-in QuickTime. It provides editing features to help you perform simple video editing and can also be used as a video player and screen recorder. However, if you want to use QuickTime as a screen recorder to record internal audio, you need to download Soundflower first:
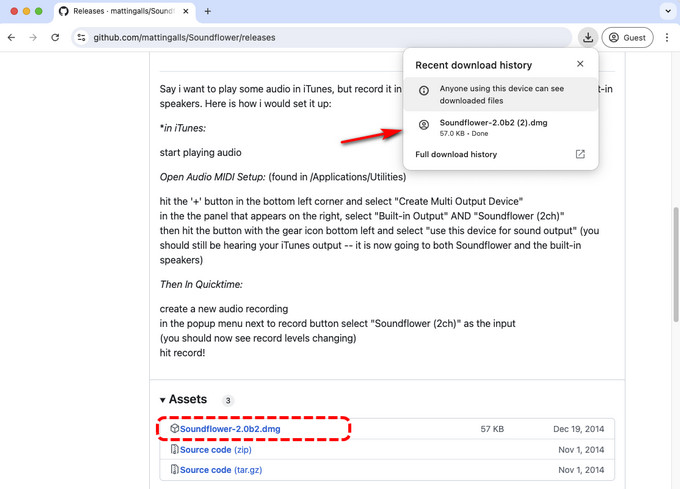
- Open the Soundflower download page in the browser.
- Click on the first Soundflower DMG file. Your download will begin automatically. Once the download is complete, you can view it in the upper right corner.
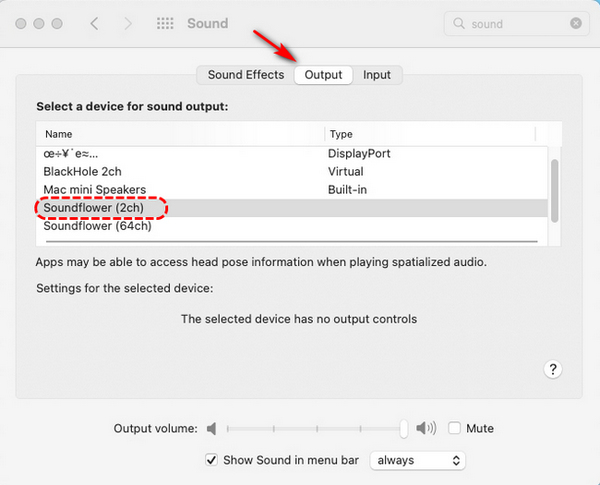
- Then, click System Preferences > Sound > Output > Soundflower (2ch) to change output device of your Mac. The tool has been installed, and you can now record audio and video using QuickTime.
Here’s how to use the QuickTime record screen with audio:
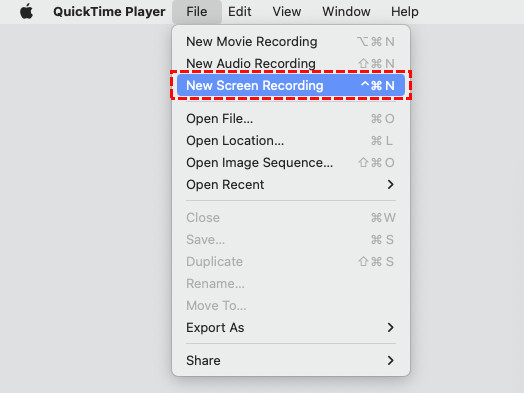
- Open your QuickTime Player and click File > New Screen Recording.
- Then select the full screen or a customized area and click Options > Soundflower (2ch).
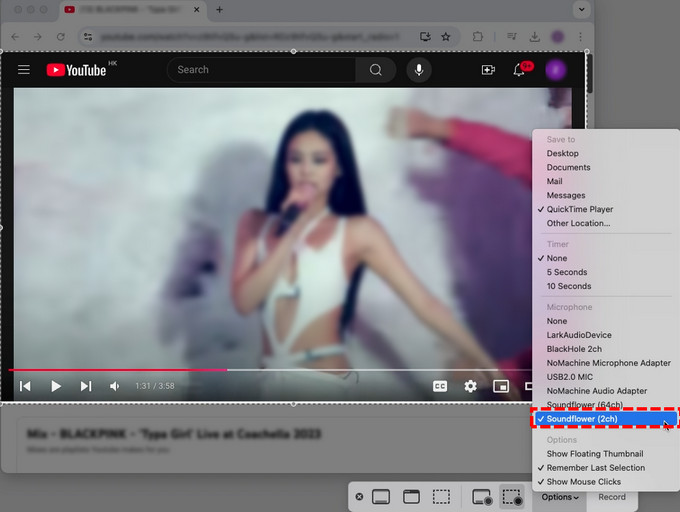
- After setting up, tap the Record button to start recording screen and internal audio. To stop recording,hit the Stop icon on the top menu or press Command+ Control + Esc. QuickTime Player will automatically play your screen recording with internal audio.

Record Screen and External Audio with QuickTime
If you want to record an online lesson, you may want to include your voice. This method will tell you how to proceed with QuickTime screen recording with audio:
- Open QuickTime Player, tap File > New Screen Recording.
- Then, choose to record full screen or a custom region depending on your needs. Click Options and select the microphone connected to the computer, like USB2.0 MIC.
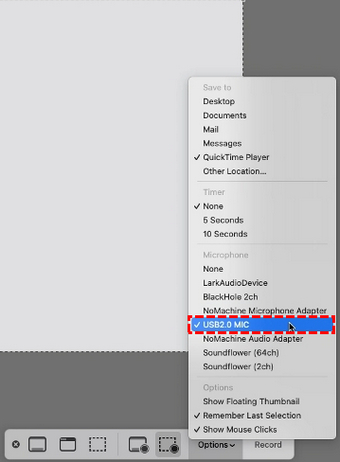
- After setting up, click the Record button and QuickTime will automatically record the screen and sound. When you’re done recording, hit the Stop button or press Command + Control + Esc.

- When you finish recording, QuickTime automatically plays the recorded video so you can preview or edit it.
Review QuickTime Screen Recording
While QuickTime is a convenient screen recording program, it has its shortcomings. Here are some common limitations to QuickTime screen recording:
● Single recording mode with only basic screen recording functions.
● Unable to record system sound directly.
● Can only export video in “.mov” format.
● QuickTime Player has not been updated for a long time.
● Some security holes have not been patched.
Part 2. The Easiest Alternatives to Screen Record with Audio on Mac
While you can use the built-in QuickTime on your Mac for screen recording, QuickTime does not record sound directly. You have to download Soundflower to capture your screen and audio, and the complicated setup can be intimidating to the novice. So, we will introduce you to several alternatives to QuickTime.
DiReec Online Screen Recorder
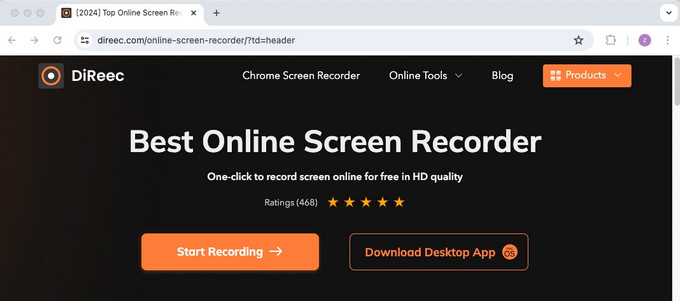
Looking for an online screen recorder with no installation needed on a Mac, DiReec Online Screen Recorder is the best choice.
It is the cutting-edge solution for Mac users with recording needs. Additionally, it features a user-friendly interface that lets you record screen and audio easily with no lag and supports various recording modes.
Here’s how to record screen on Mac with audio using DiReec Online Screen Recorder:
- Open DiReec Online Screen Recorder in your browser. Then click Start Recording to get started.
- To record screen and internal audio, select the Screen and System Sound icons. If you still want to record the microphone sound, trick the Microphone icon. After completing the selections, hit the Start Recording button.
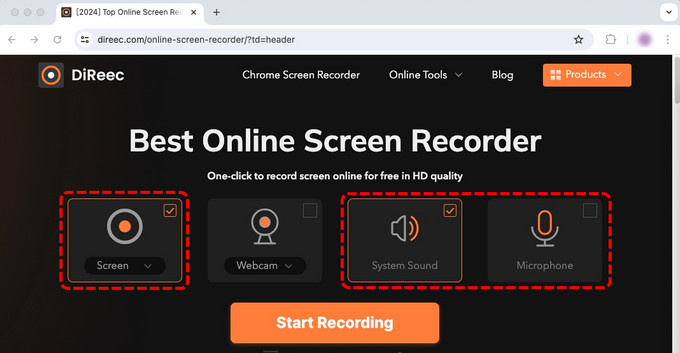
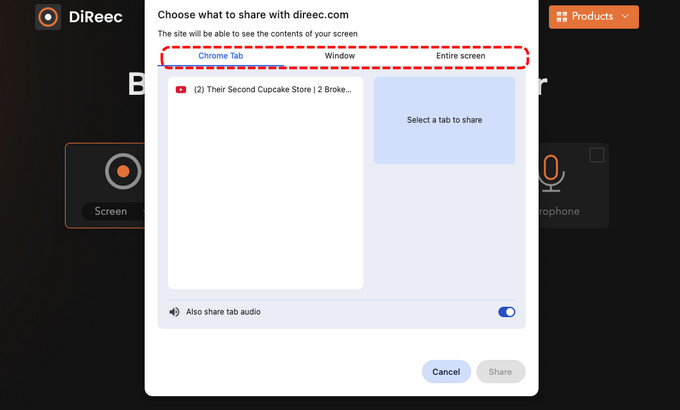
- Next, select your desired recording area, which includes the entire screen, a specific window, or only a tab. Then tap Share to start recording.
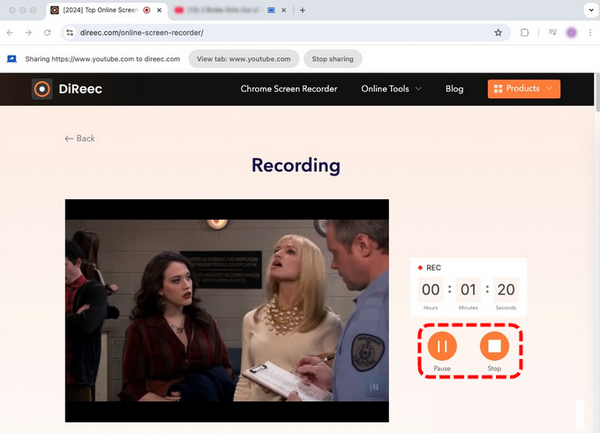
- While recording, you can click on the corresponding button to pause or stop the recording. Once completion, click the stop icon.
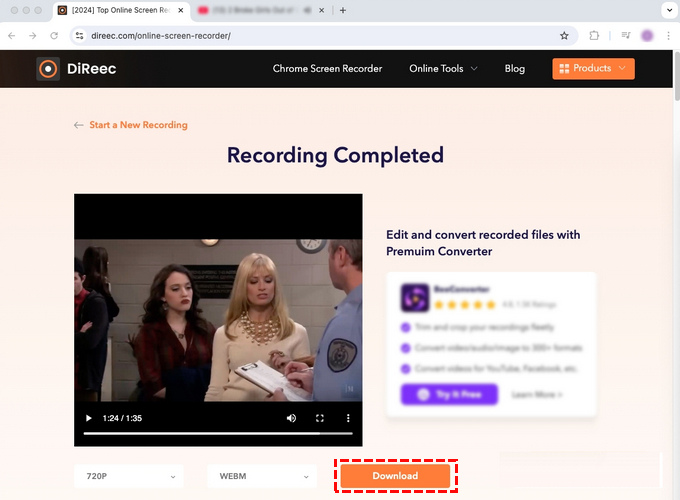
- Then, you can check the recording on this page. If you think it’s okay, click the Download button to store the file on your Mac.
DiReec Pro Screen Recorder
For those who want to screen record with audio in high quality, DiReec Pro Screen Recorder may be a great alternative to QuickTime.
It offers multiple recording modes, allowing users to capture the entire screen or set a specific area as required. By doing so, you can easily record screen with audio, webcam, and picture-in-picture video. Moreover, you can also capture high-quality sound with the help of noise reduction tools.
There are more features for you to explore. Download DiReec best screen recorder for Mac and start screen recording!
Here’s how to record QuickTime screen with audio using DiReec Pro Screen Recorder:
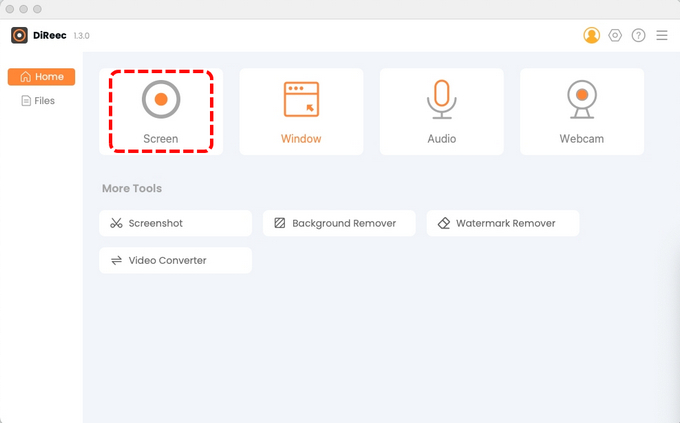
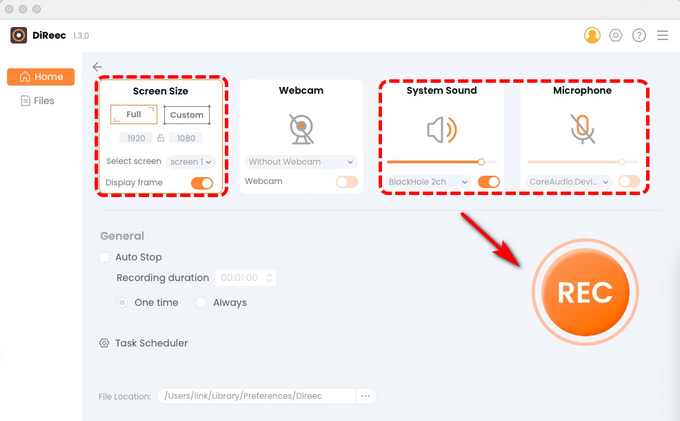
- Download and launch DiReec Pro Screen Recorder on your Mac, and select Screen recording mode.
- To record the screen with audio, click System Sound or Microphone based on your needs. Then tap REC to begin recording.
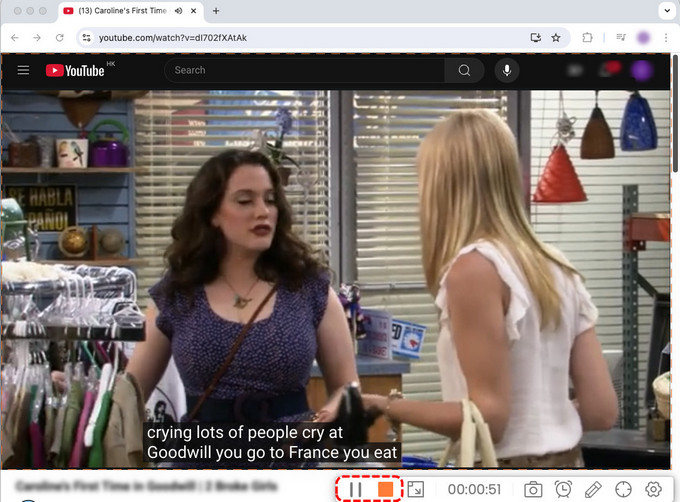
- After the countdown, the screen recording will begin. You can pause during recording. When the recording is finished, click the orange Stop button.
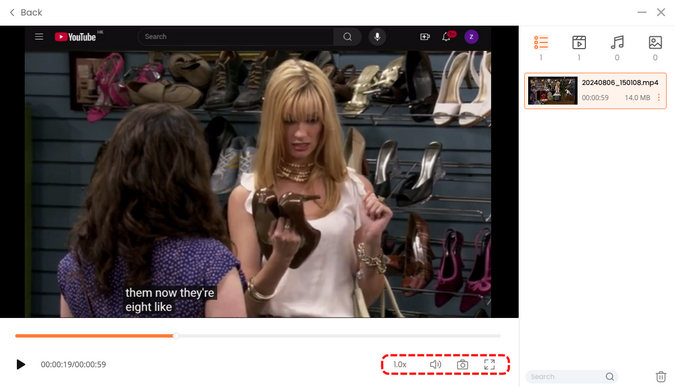
- The recorded video will be saved on the File page for preview. You can adjust the multiplier speed and capture screenshots.
OBS Studio
OBS Studio is an open-source program that allows users to capture screen with audio. Additionally, you can record everything that’s going on your screen and make presentations, professional tutorials, and live streams.
Let’s learn how to screen record with audio on Mac using OBS Studio:
- Download OBS Studio from the official website.
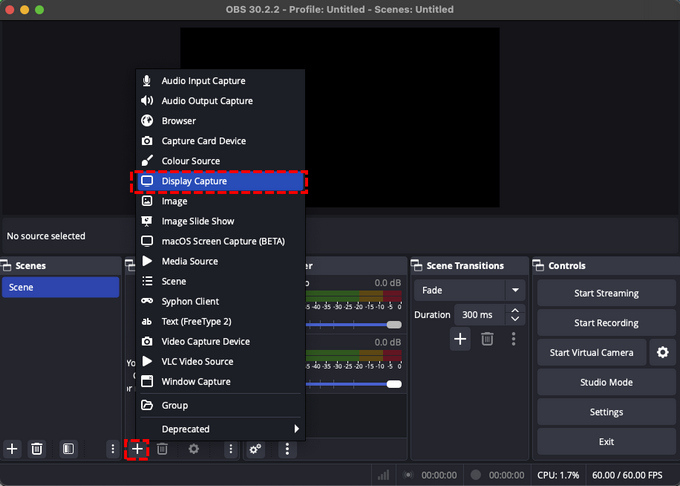
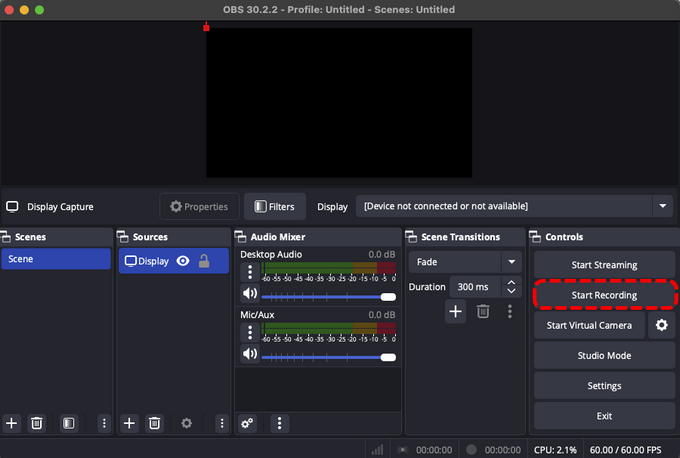
- Launch the OBS Studio. Upon opening, OBS automatically inserts a Scene into the interface. But if it doesn’t, just tap the + icon. And you will find it in the Scene tab in the lower left corner of the screen.

- Find the Sources box situated at the bottom of your screen and tap the + icon. From the options menu, tap Display Capture and hit OK.
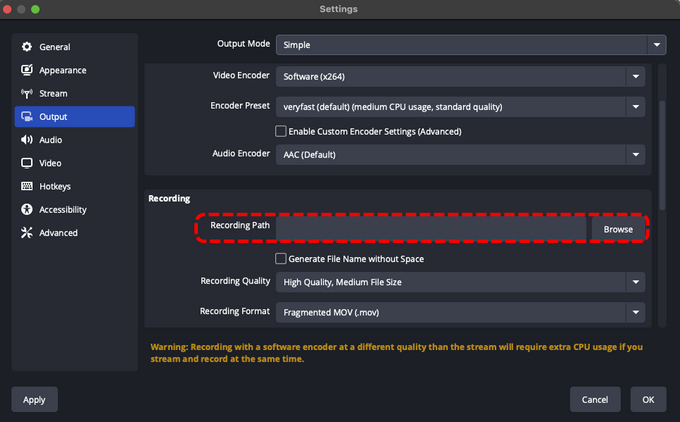
- Next, tap Settings on the bottom right, then select Output from the sidebar. Here, hit the Browse next to Recording Path and set a destination.
- When everything is done, click Start Recording. Once finished, tap Stop Recording in the Controls pane.
Part 3. Comparing QuickTime and Its Alternatives
| Feature | QuickTime | DiReec Online Screen Recorder | DiReec Pro Screen Recorder | OBS Studio |
| Screen recording | √ | √ | √ | √ |
| System sound | × | √ | √ | √ |
| Microphone audio | √ | √ | √ | √ |
| Simultaneous screen recording with audio | × | √ | √ | √ |
| Picture-in-picture during recording | × | √ | √ | √ |
| Noise reduction | × | × | √ | √ |
| Easy to operate | √ | √ | √ | × |
Conclusion
With the increase in the number of online content creators, the demand for screen recording software has grown in recent years. Screen recording software has become indispensable for recording video and audio on Mac computers. Many Mac users still use QuickTime screen recording with audio.
Although QuickTime player is easy to use, it has many limitations. For example, QuickTime player not recording audio, you need to install Soundflower to record sound.
If you want a good alternative, install DiReec Pro Screen Recorder. It not only allows screen recording with microphone sound and system audio, but also supports lossless recording quality. Try to download it immediately; it will never let you down!
FAQs
Why does my QuickTime Player have no sound?
The issue is commonly encountered by Mac users these days. The primary reason behind this could be wrong microphone settings or sound input settings. Here are some straightforward ways to fix a QuickTime player with no sound:Check and adjust microphone settingsCheck and adjust QuickTime Player settingsCheck the sound input settingsReset RAMDisable ambient noise reduction
How do I record internal audio on a Mac without Soundfower?
There are alternative methods for capturing internal audio if you don’t want to install Soundflower. Consider using an online tool like DiReec Online Screen Recorder. This tool allows you to capture both system audio and microphone at the same time.
Where do QuickTime screen recordings go?
When you use QuickTime to record screen with audio, the finished recording video will be stored in your Documents folder, but you can change the destination. Just click on Options in QuickTime toolbar before you start recording, choose other Location, and navigate through your computer to specify where you'd like to save your file.In case you overlook this procedure, access a finder window and locate Screen recording. The video should be the most up-to-date recording, and you can rename and relocate it for quick access in the future.