[Solved] How to Screenshot on Dell? (4 Solutions for You)
Taking screenshots is a convenient way for computers, allowing users to save the current screen as an image. It serves various purposes, such as recording important information or preserving beautiful scenes from videos or games. Making screenshots is very easy; you don’t need to know or use complicated code. In fact, you only need a few simple steps to quickly take a screenshot. Now, let’s use Dell laptop as an example to list some simple ways to take screenshots on PC. And here is how to screenshot on Dell.
Contents
Part 1: How to Take a Screenshot on Dell with Hotkey?
One of the most common ways for taking a screenshot is to use hotkey. In computing, hotkey also known as a keyboard shortcut. It is a series of one or several keys to quickly invoke a software program or perform a preprogrammed action. Back to screenshot, it means you can simply take a screenshot by pressing a few keys on your keyboard.
There are many different hotkeys that can take a screenshot on Dell laptop, and they have different functions.
How to Screenshot on a Dell Laptop and Save to Clipboard?
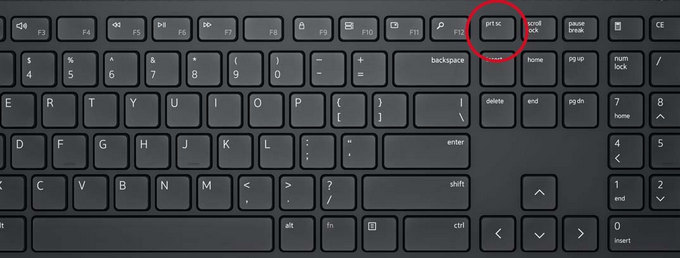
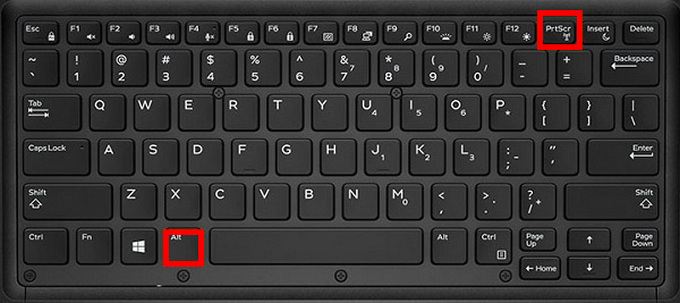
You can take screenshot on Dell laptop by pressing Print Screen key.
There is a key for screenshot on Dell keyboard, that is the Print Screen key, which is typically located in the upper right corner of your keyboard. Different keyboard may label the Print Screen key differently, such as PrintScreen, PrntScrn, PrntScr, PrtScn, PrtScr, PrtSc, or a similar abbreviation.
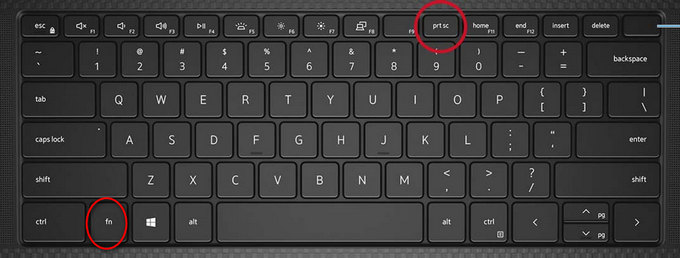
In Dell laptop, you can perform the Print Screen function by pressing and holding down the Fn + Print Screen key.
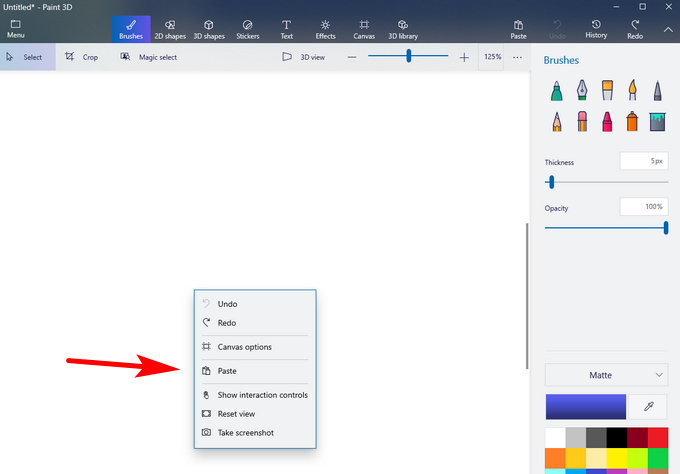
Once you do it, it will capture what the current screen is showing. The screenshot is automatically copied to your computer clipboard. You can then paste the screenshot into a document, email message, file, or image editor (Paint, for example).
How to Screenshot on Dell Computer and Save to Folder?
However, in many cases, it is not very convenient when the captured picture is only saved to the clipboard, as you then have to open an image editor or document to paste it. Is there any way you can save a screenshot as an image file directly and find it at any moment?
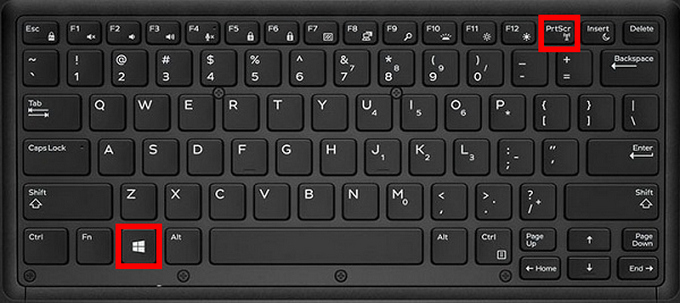
The answer is yes, and it depends on what OS you are using. For Dell computer which is running Windows 8 or 10. Press Windows logo key + Print Screen key to capture the entire screen. To view screenshot you just captured, go to the Pictures folder > Screenshots, where the pictures will be saved automatically.
For Dell computer which is running Windows 7/XP/Vista. Press Alt + Print Screen key to capture your screen. The pictures will also be saved in Pictures folder > Screenshots automatically.
Part 2: How to Take Screenshot on Dell without Hotkey?
Hotkeys were originally designed to make computers easier to use. However, for various reasons, sometimes people don’t use hotkeys, and sometimes they simply forget the combinations of hotkey. Are there alternative ways to take screenshot on Dell laptop or how to screenshot on Dell without relying on hotkeys?
How to Take a Screenshot on Dell Laptop with Snipping Tool?
Snipping Tool is a Microsoft Windows screenshot utility that is included in Windows Vista and later. It can take still screenshots of an open window, rectangular areas, a free form area, or the entire screen. Snips can then be annotated marked up using multiple annotation tools., stored as an image file or an MHTML file, or e-mailed.
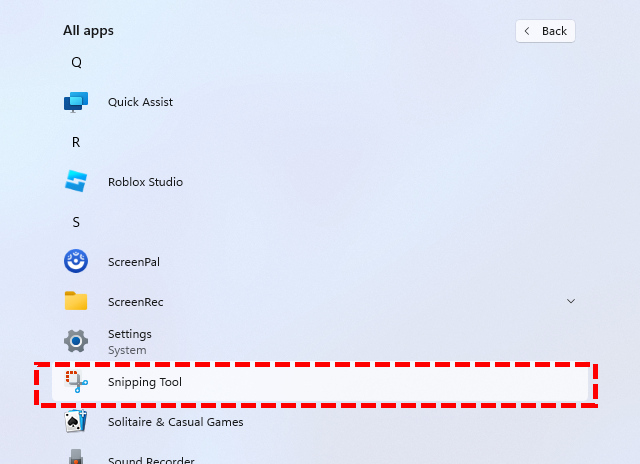
You can find the Snipping Tool directly on your Dell PC. What follows is how do you screenshot on Dell with it:
- Click the Start menu in the lower-left corner of the screen, find Snipping Tool and open it.
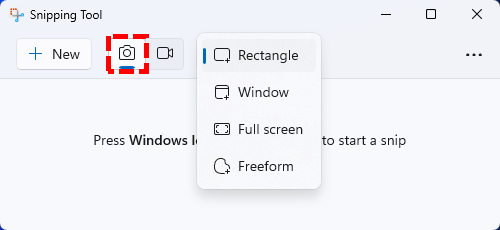
- Click Camera icon to choose screenshot mode. You can select Full-screen Snip to capture the entire screen, or Window Snip to capture a single window. If you have special needs, you can also choose Free-form Snip or Rectangular Snip to take screenshots of specific areas.
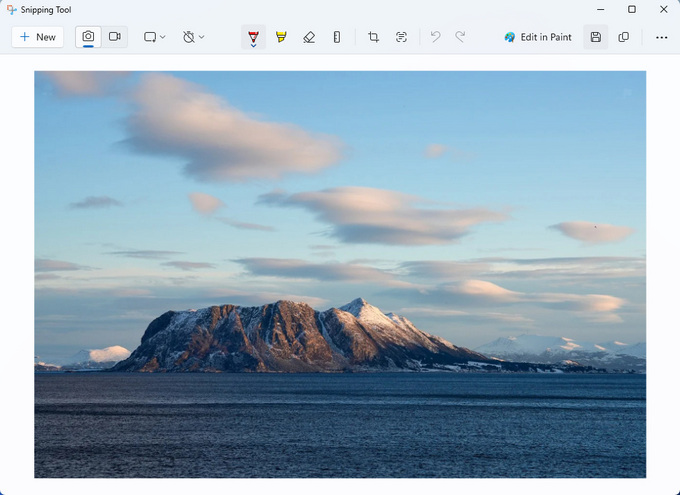
- Click +New to capture your screenshot. Once captured, a window will appear showing the screenshot, allowing for some quick edits. If unsatisfied, hit New to recapture. Alternatively, hit Save as icon to save.
How to Screenshot on Dell Desktop with FSCapture?
FastStone Capture is a powerful screen capture tool. With its handy capture panel, you can easily capture screen and apply various effects & marks. Also, you have the ability to edit images and convert images into different formats.
FastStone Capture is an amazing tool, and this is how to screenshot on Dell Windows with it:
- Download and install FastStone Capture. When you need to take a screenshot, open it and you can see a small floating status bar representing 6 different capture methods.

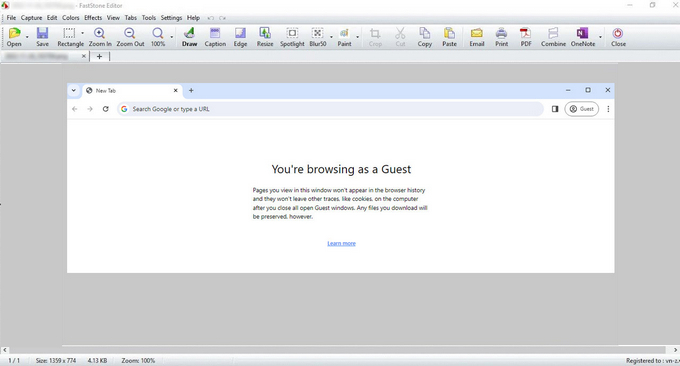
- Click on different buttons to take different types of screenshots. Here, we take the capture window/object as an example. After clicking on the object icon, a red border will appear around your active window. Place the mouse on the window you want to capture and click the left mouse. Then, you will be directed to FastStone Editor, which displays your captured picture.
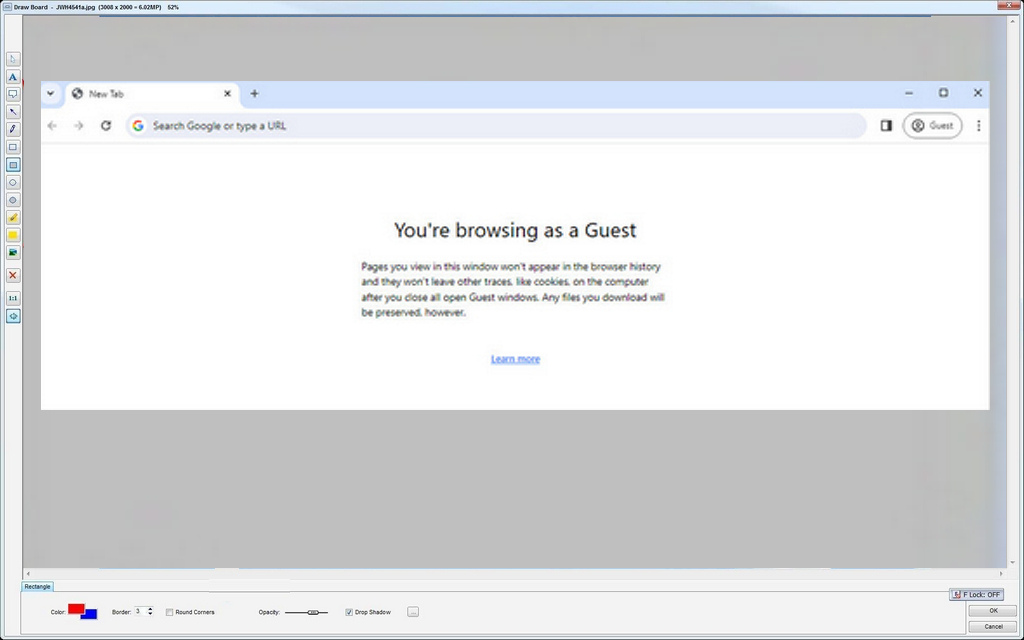
- You can also click Draw to make marks on the picture. FastStone provides a large number of customizable marks, including arrows, box selections and other very practical marks.
How to Screenshot on Dell with DiReec?
DiReec is a convenient screen capture, screen recording, and audio recorder. You can easily capture and record screens, as well as mark up and draw while grabbing an image, providing a full range of basic capture and editing capabilities. These features complement each other, making DiReec as a comprehensive, easy-to-use tool software.
Here is how do you screenshot on Dell computer with DiReec:
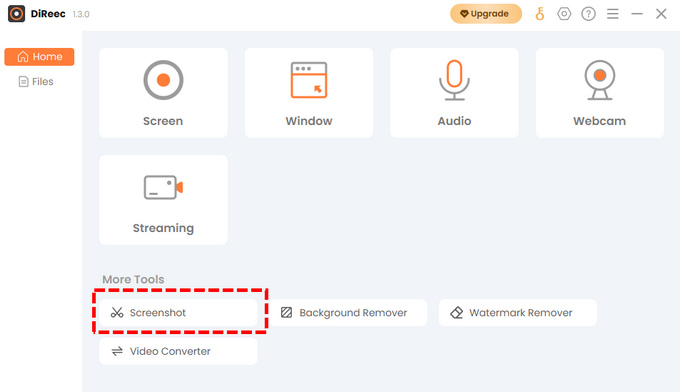
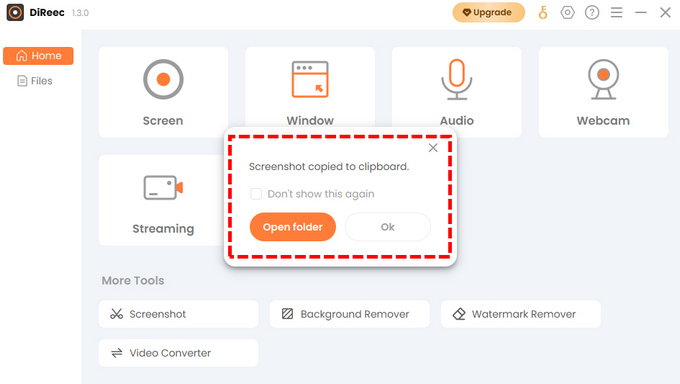
- Download and install DiReec for free and open it. Find Screenshot button in More Tools and click it.
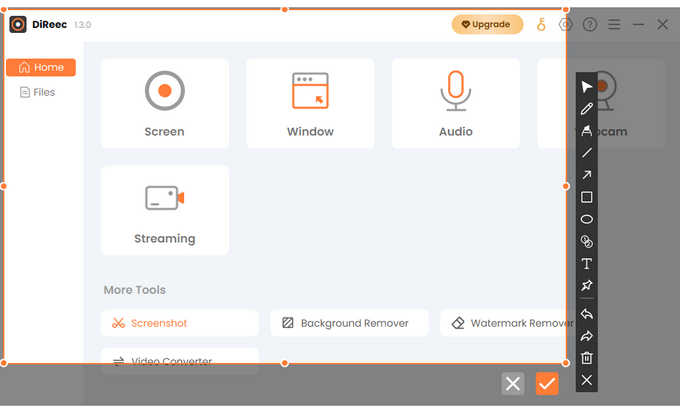
- When you click Screenshot button, your pointer will turn into a giant crosshair, click and drag to capture a specific area. Once selected, a toolbar with various annotation tools appears, helping you make marks on the picture. When you’ve finished your mark, click the checkmark below to save your image.
- After the screenshot is taken, it will be copied to your clipboard, you can paste it anywhere you need. And you can also find the screenshot as an image file in a folder if you need it.
Conclusion
How to screenshot on Dell is a very simple question and you have many options to do it. Whether you use your computer’s built-in hotkeys and Snipping Tool, or download software to take screenshots, you can get screenshots that satisfy you. However, if you think that the functions of Dell’s own screenshot tool cannot meet your needs. And if you don’t want to download and install a software only for taking screenshots, then you can try DiReec, which is a tool with multiple functions and very easy to operate. Not only can you take screenshots, but you can also record video and audio easily. It can become a very effective assistant in your office, study, and daily life.
FAQs About How to Screenshot on Dell
How to take a screenshot on Dell laptop?
You can use hotkeys to take screenshots on your computer. If you don't want to use hotkeys, you can also use software to do this for you, such as DiReec Screen Recorder. It is a multifunctional software that can help you record screen, record audio, and take screenshots.
How to screenshot on Dell desktop keyboard?
It is easy, for Windows 8 or 10, press Windows logo key + Print Screen key Windows to take screenshot. For Windows 7/XP/Vista, you need to press Alt + Print Screen key to do so.
What can I do if screenshot not working on Dell laptop?
If you can't use hotkeys to take screenshots, you can check to see if your keyboard is working properly, or if your hotkeys are locked by another program. Or you can use DiReec Screen Recorder to help you take screenshots, it can help you take screenshots quickly, and you can make marks on the screenshots.


